
Meal Prep Containers Buying Guide
KEVIDKO Buying Guides / Prepared Meals
Choose the Container Your Meal Deserves.
A chicken-and-rice lunch, a generous chopped salad, and a meal with two sides should not have to fit the same box. Start with how the food will be arranged and eaten, then choose the size and closure that make the whole order work.
This guide compares meal prep containers sold in the KEVIDKO shop: black-base rectangles, divided trays, Genpak ProView hinged containers, and pulp fiber bowls.
Find Your Starting Point ↓What Are You Packing?
One Composed Meal
Rice with toppings, pasta, or an entrée arranged beside a side can work in one open space. Start with a rectangle if long ingredients need room to lie flat.
Compare Three Rectangular Sizes →An Entrée and Separate Sides
Choose divisions when you want each component to keep its own place. Check the size of each section—not just the tray’s total capacity.
Compare Divided Containers →A Bowl-Style Menu
A round fiber bowl gives salads and composed bowls a different presentation from a black tray. Remember to include the lid as a separate purchase.
Compare Fiber Bowls →Rectangular Containers: Give the Food One Open Space
For a meal that belongs together, an undivided base lets you arrange the food without working around molded walls. These three options include clear lids and come in cases of 150 sets.

24 oz Rectangular Containers
Start here for a more compact presentation. Trial-pack your actual portion: the goal is a comfortably filled container, not a lid pressing down on the food.
24 oz · Clear Lids Included · 150 Sets
View Container →
Solex 28 oz Rectangular Containers
A middle option to compare against the 24 oz size when the same menu needs a little more nominal capacity. Keep the final arrangement in view through the clear lid.
28 oz · Clear Lids Included · 150 Sets
View Container →
38 oz Rectangular Containers
Compare this larger open format for a more substantial meal. It leaves the layout up to your kitchen rather than allocating space to fixed compartments.
38 oz · Clear Lids Included · 150 Sets
View Container →Ounces Are Capacity, Not the Weight of Your Lunch
A 28 oz container does not mean you can pack 28 ounces by weight of every recipe. Leafy greens, rice, and a chicken breast occupy space differently. Check the food’s footprint and height with the lid closed, not just the ounce number on the listing.
Compartment Containers: Decide What Needs Its Own Space
Choose two compartments for a main-and-side arrangement, or three when the meal genuinely needs three serving areas. More divisions are not automatically better: a divider can get in the way of a long entrée or leave an awkwardly small space for the side.
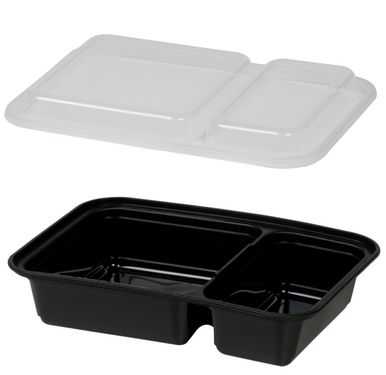
Solex 30 oz Two-Compartment Containers
A straightforward starting point for an entrée and one side. The 30 oz rating is the total container capacity, not the capacity of each section.
2 Compartments · Clear Lids Included · 150 Sets
View Container →
42 oz Three-Compartment Containers
Three serving areas beneath a single-compartment clear lid. Useful for organizing an entrée and accompaniments, but the lid is not divided to seal each section independently.
42 oz Total · Clear Lids Included · 150 Sets
View Container →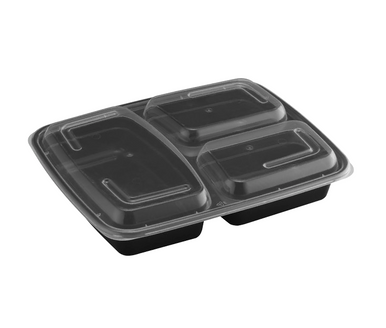
Three-Compartment Black Meal Containers
Another three-section layout to compare with your actual portions. Choose between layouts by how the meal fits, rather than assuming every three-compartment tray divides its space the same way.
3 Compartments · Clear Lids Included · 150 Sets
View Container →A divider is not a sealed sauce cup. Do not assume compartment walls stop liquids from moving between foods during transport. If a sauce must stay separate until eating, make a covered portion cup part of the package and check its fit with the main lid closed.
For Reheating: Start With a Verified Container
Genpak identifies these two ProView containers as polypropylene and microwave-safe. Both have a black base and clear vented hinged lid, so the lid stays attached at the packing station. Pick the internal layout that suits your meal.
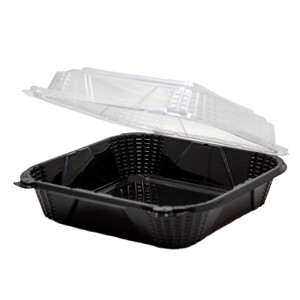
Genpak ProView Single-Compartment Containers
One open serving area for an undivided meal. Genpak lists the actual dimensions as 8.50 × 8.13 × 2.78 inches; the shop uses the familiar nominal 8 × 8-inch format.
Attached Clear Lid · 150 Containers
View Container →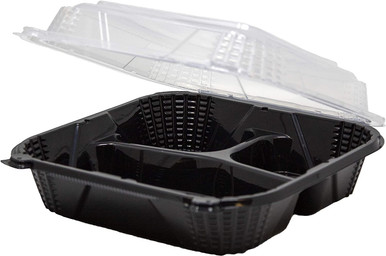
Genpak ProView Three-Compartment Containers
A divided alternative with the same published outer dimensions. Choose it when separate serving areas improve the meal, not simply because it has more compartments.
Attached Clear Lid · 150 Containers
View Container →Manufacturer references: Single-Compartment ProView Specifications and Three-Compartment ProView Specifications.
Confirm the Whole Use, Not Just the Material
Follow the manufacturer’s instructions for the exact package. Microwave suitability does not establish oven suitability, freezer performance, or a reusable-container lifespan. For any other container in this guide, confirm the base and lid requirements before promising customers they can reheat their meal in the packaging.
Fiber Bowls: Make the Bowl Part of the Presentation
For a menu built around salads and bowl-style meals, compare these pulp fiber options. The smaller size may frame a compact serving better; the larger size gives bulky ingredients more nominal capacity. Test your recipe and intended holding conditions before standardizing the package.
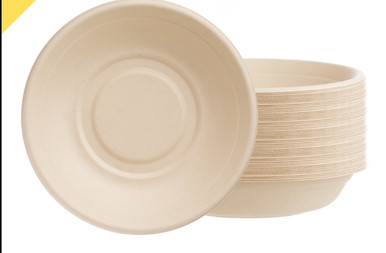
24 oz Round Pulp Fiber Bowls
The smallest of these three bowl options. Compare it for compact bowls and sides before moving to a larger size by default.
500 Bowls · Lids Sold Separately
View Container →
32 oz Round Pulp Fiber Bowls
A middle-size option for composed bowl meals. Arrange the actual ingredients and toppings before deciding whether it gives the presentation you want.
500 Bowls · Lids Sold Separately
View Container →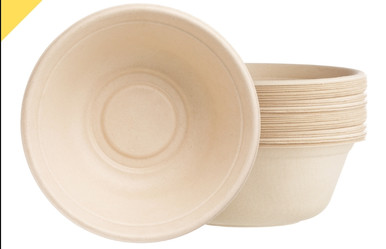
48 oz Round Pulp Fiber Bowls
The largest nominal capacity in this trio. Compare it for a bulkier salad or more generous bowl, while checking how the closed package fits your carryout bag.
500 Bowls · Lids Sold Separately
View Container →Add the Lid to the Order
Clear Stackable Dome Lids for 24, 32 & 48 oz Round Pulp Fiber Bowls are sold separately, 500 per case. One 500-count bowl case and one 500-count lid case provide equal quantities of both pieces. Confirm the pairing when ordering; this is not a claim that the lid fits every bowl with those ounce ratings.
Fiber appearance alone does not establish microwave, freezer, or composting suitability. Check the exact bowl, lining, and lid requirements for your intended use.
Pack One Real Order Before You Buy for the Whole Menu
The most useful comparison is not an empty container on a desk. It is the meal your customer will receive.
- Build your usual portion. Include toppings, garnishes, and any covered sauce cup. Close the lid without compressing the food.
- Try the actual pickup or delivery setup. Pack the containers in your normal bag, with the number of meals a customer commonly orders. Check the stack, the grip, and whether the lids stay seated.
- Check it at the intended handoff. Look for movement between sections, moisture on the lid, softened textures, or a presentation that no longer matches what left the kitchen. Use your established food-handling procedures throughout the trial.
- Write down the approved pairing. Record the container, lid if separate, portion layout, and verified handling instructions so the next shift packs the same meal the same way.
A successful packing test does not establish food shelf life. Keep storage and food-safety decisions within your established procedures.
Keep the Purchasing List Short—and Complete
You may not need a different container for every recipe. Start by testing an open container for composed meals, a divided option for plated combinations, and a bowl only if your menu calls for one. Add a smaller or larger size when an actual dish needs it.
Compare the cost of a complete package: base, lid, and any separate sauce cup or cutlery your service includes. A low bowl price is not the finished packaging cost when lids are sold separately. Current pricing and availability are on each linked product page.
Ready to Build Your Meal Prep Order?
Use the product links above to compare the formats that fit your menu, then check the case counts and included components before checkout.